How to Use Zapier’s No-Code Automation with Custom GPTs
A Step-by-Step Guide to Unlocking Smarter Automation for Your Workflows
Ever wondered how to supercharge your productivity by combining the power of GPT and Zapier’s no-code automation? With this guide, you’ll learn how to effortlessly integrate GPT into apps like Gmail, Google Sheets, and more. This simple yet effective method lets your GPT handle repetitive tasks, freeing you up for more creative work.
Why Use Zapier with Custom GPTs?
The combination of Zapier’s seamless app integrations and GPT’s versatility creates an unbeatable automation powerhouse. From sending emails to managing data across multiple apps, you can automate tasks that previously consumed hours of manual effort. Whether you’re a beginner or an automation expert, this guide will help you connect the dots in just three steps.
Step 1: Adding Zapier Actions to Your GPT
Getting Started with GPT Configuration
First, you need to ensure your GPT is ready to support Zapier actions. Follow these steps:
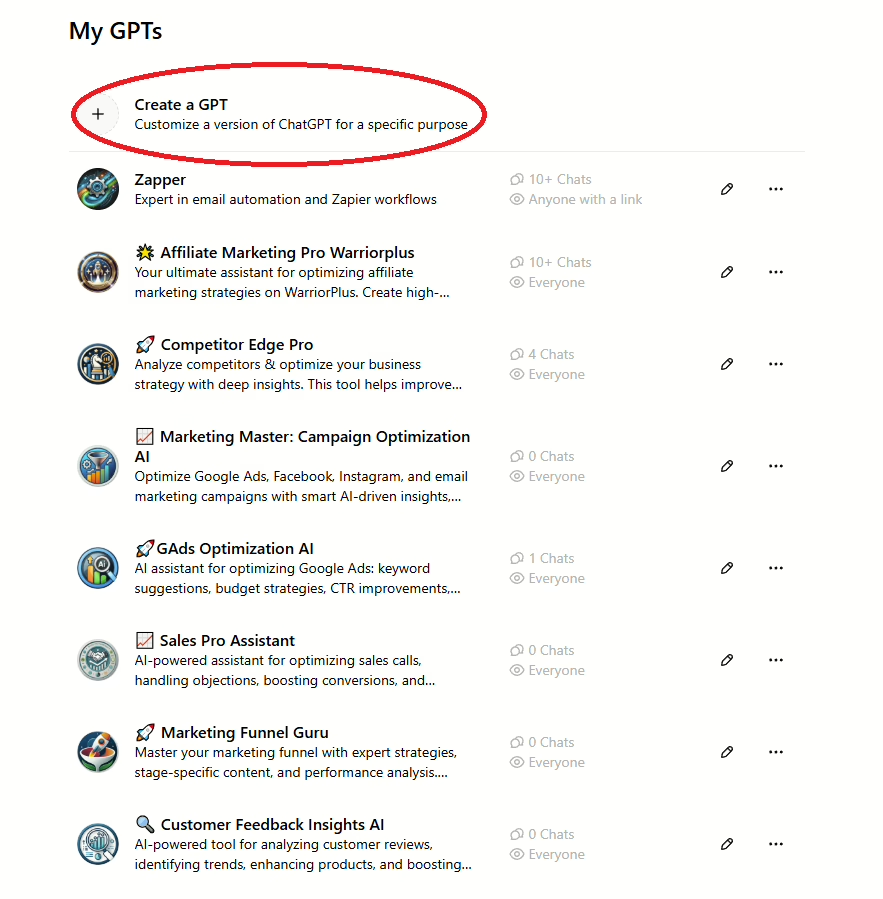
- Create a GPT: If you don’t already have a custom GPT, go to OpenAI’s interface. Under the “My GPTs” section, click “Create a GPT” to start.
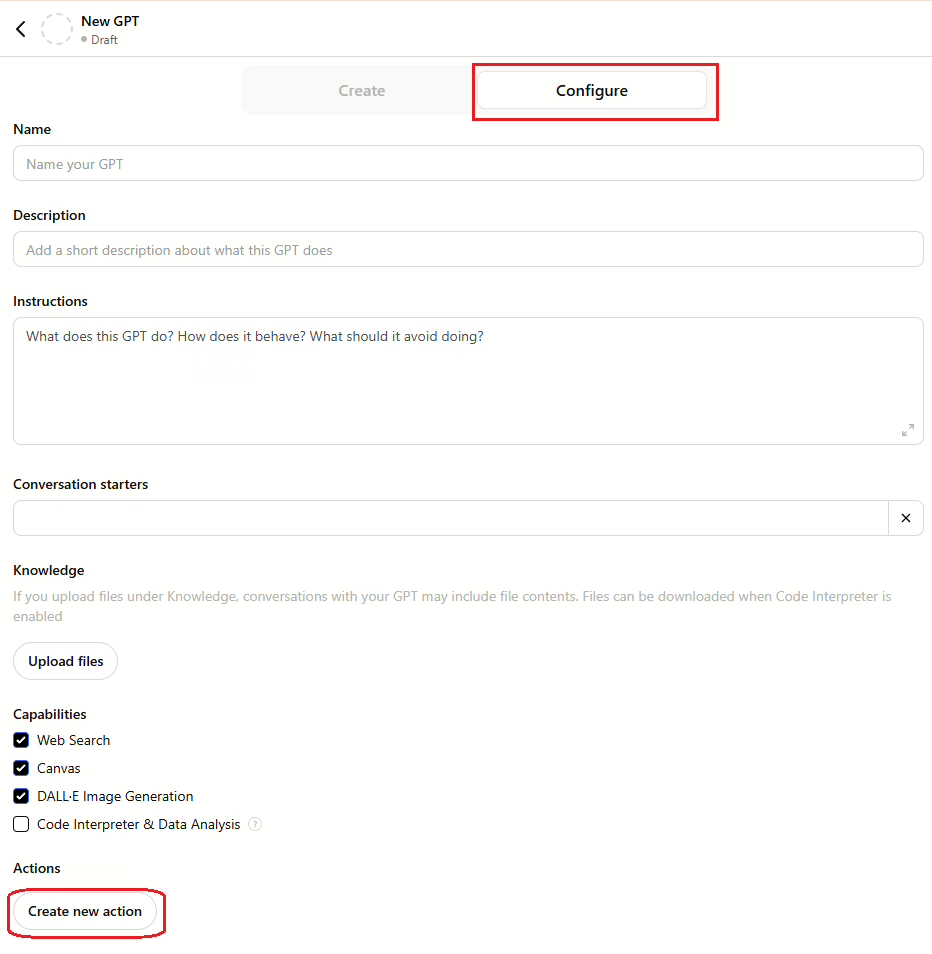
- Access the Configuration Tab: Open the GPT Builder and click on “Configure.”
- Add a New Action: Select “Create New Action” to set up the integration.
Importing Zapier Actions
Zapier provides a ready-made schema for GPT integration. Here’s how to import it:
- Click on “Import from URL” when prompted.
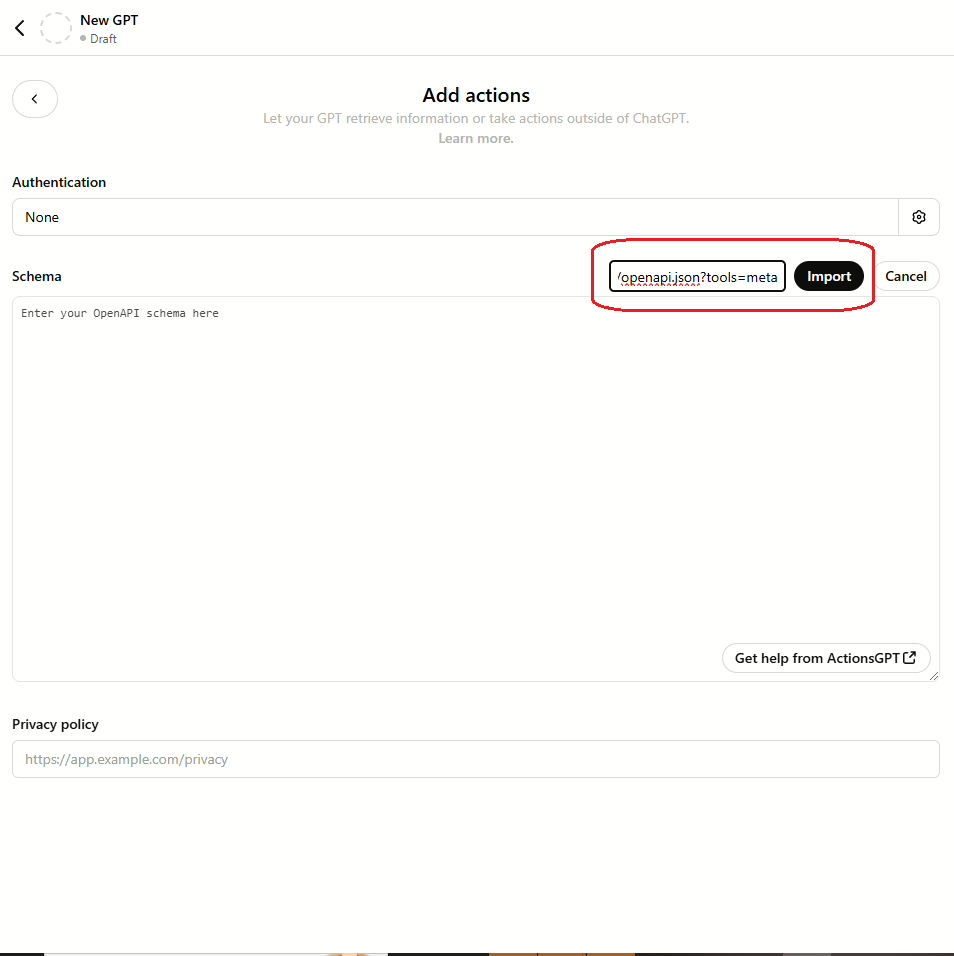
- Paste this URL:
https://actions.zapier.com/gpt/api/v1/dynamic/openapi.json?tools=meta

- Click “Import” to load the action schema.
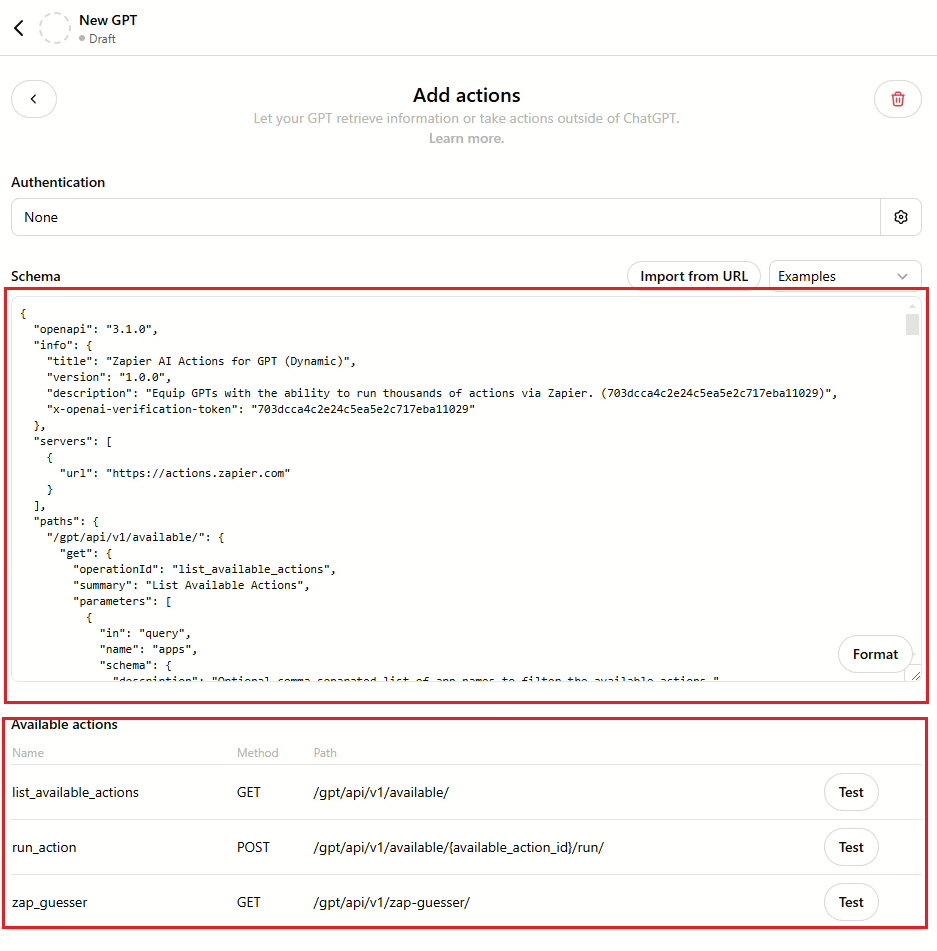
- Return to the “Configure” tab. You’ll now see Zapier actions available in the builder.
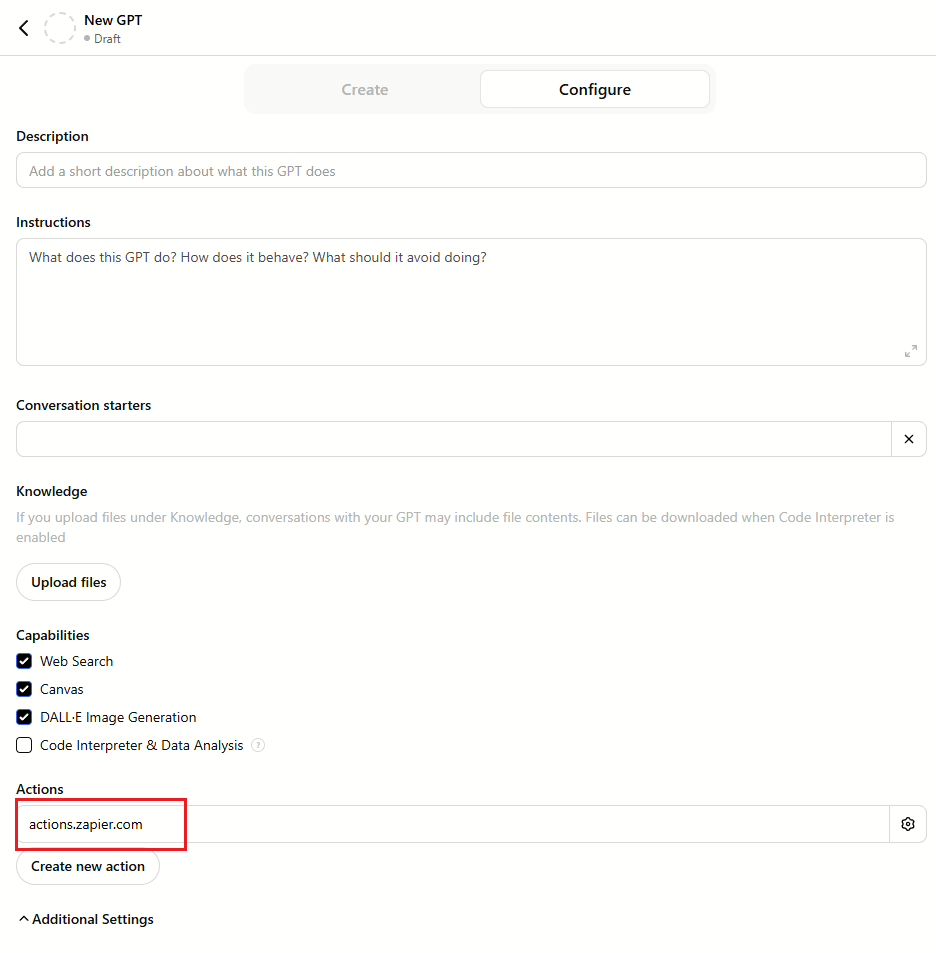
Step 2: Setting Up Zapier Instructions in GPT
For seamless communication between GPT and Zapier, you’ll need to define specific instructions. These instructions tell GPT what tasks Zapier should perform.
Defining the Rules
Copy and paste the following instructions into the Instructions Box of your GPT Builder:
Customizing GPT Instructions
- Update the Action Name and Confirmation Link fields with details from Zapier.
- Ensure these fields match the specific tasks you want to automate, such as sending emails or updating spreadsheets.
Step 3: Creating a Custom Action on Zapier
Now that your GPT is configured to communicate with Zapier, the next step is to set up the specific action you want Zapier to perform. This action serves as the bridge between your GPT and the app you’re automating, such as Gmail, Google Sheets, or Slack.
Building Your Custom Action in Zapier
- Log in to Zapier
- Visit Zapier Actions and sign in to your account.
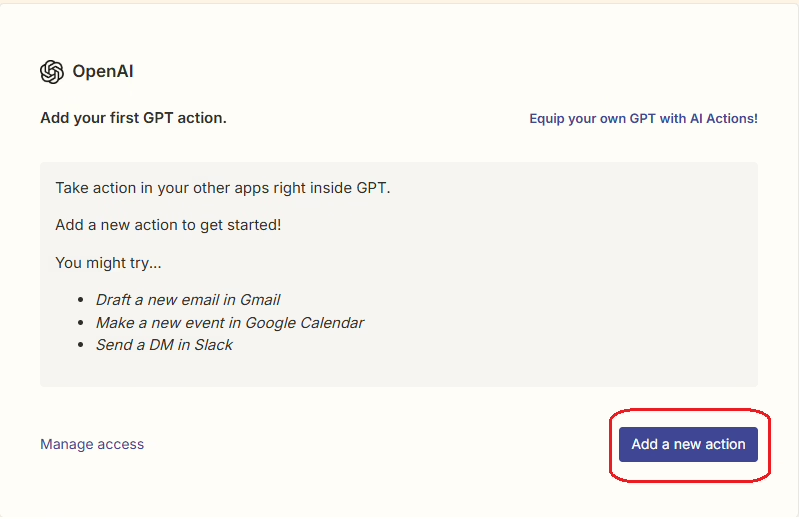
- Visit Zapier Actions and sign in to your account.
- Choose Your Action
- Decide which app you want to integrate with GPT. For this guide, we’ll use Gmail to create an action for sending an email. However, Zapier supports thousands of apps, so you can choose any platform that suits your needs.
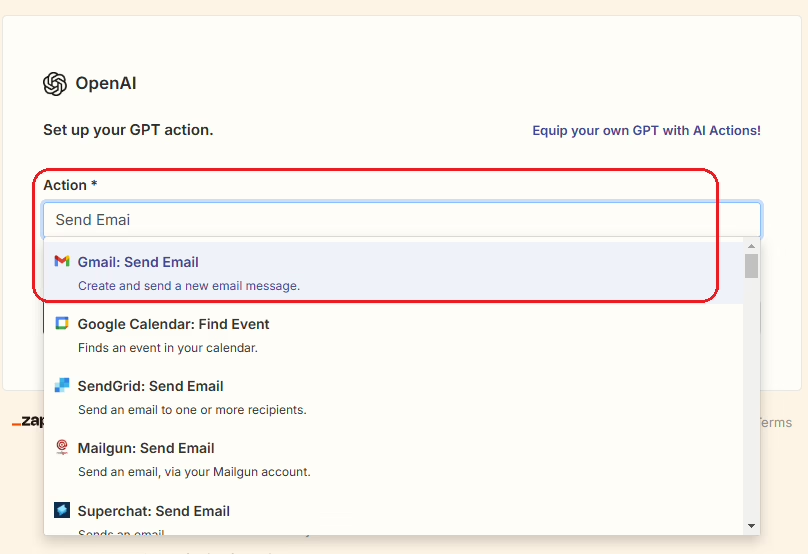
- Decide which app you want to integrate with GPT. For this guide, we’ll use Gmail to create an action for sending an email. However, Zapier supports thousands of apps, so you can choose any platform that suits your needs.
- Configure Your Action
- Connect the App: For Gmail, sign in with your account to authorize access.
- Define the Details: Customize the action with fields like:
- Recipient Email: The email address you want to send to.
- Subject: The subject line for the email.
- Body: The content of the email.
- Use the “Have AI guess a value” option to let GPT dynamically fill in these fields based on user input.
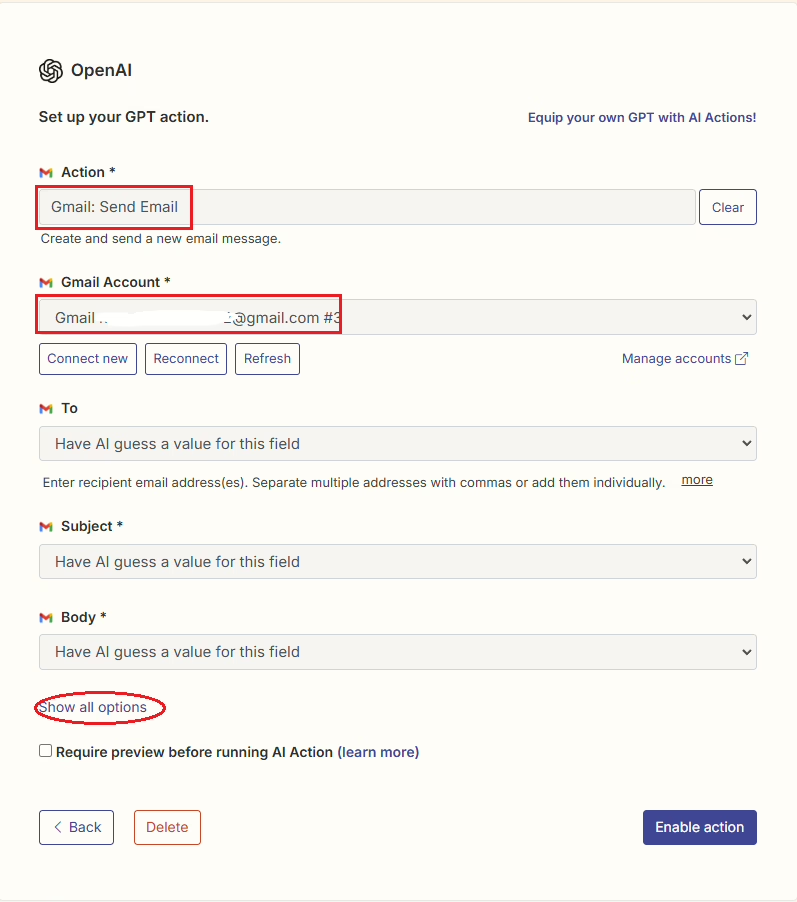
- Name Your Action
- Assign a clear and descriptive name to your action (e.g., “Send Email with Gmail”) to differentiate it from other actions.
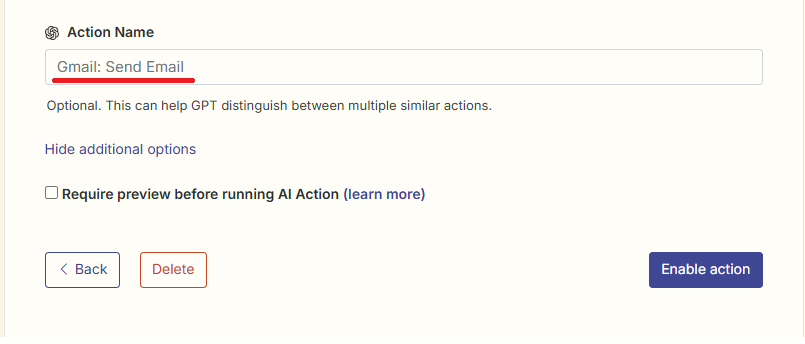
- Enable the Action
- Scroll to the bottom of the configuration page and click “Enable Action” to finalize the setup.
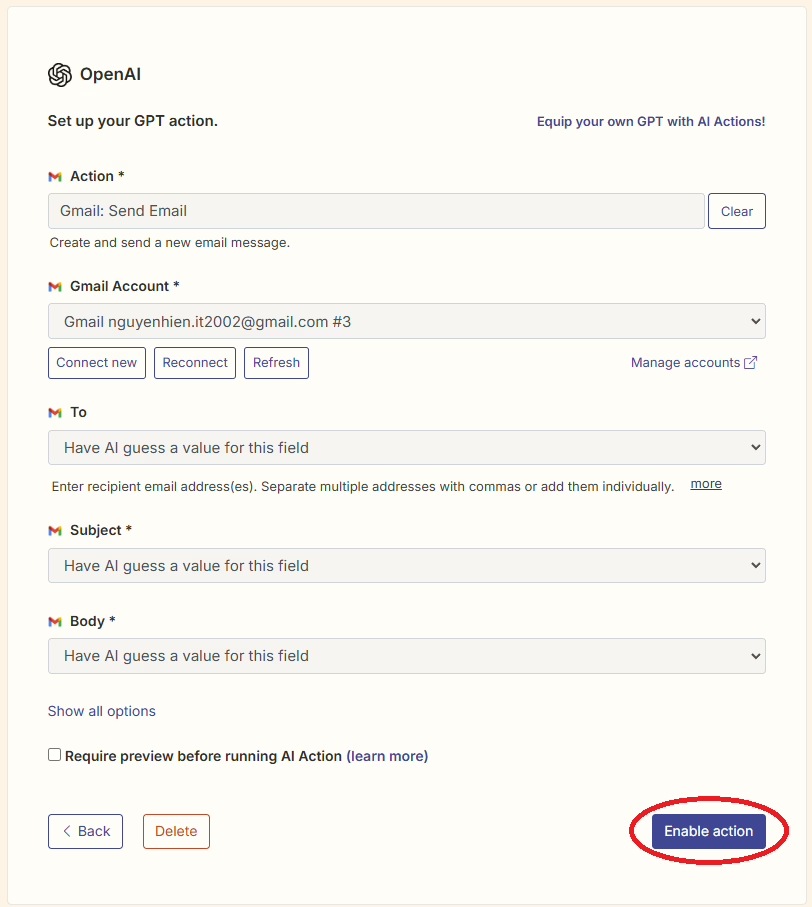
- Scroll to the bottom of the configuration page and click “Enable Action” to finalize the setup.
Linking Your Action to GPT
- Copy the Action URL
- After enabling the action, Zapier will generate a unique URL for it.
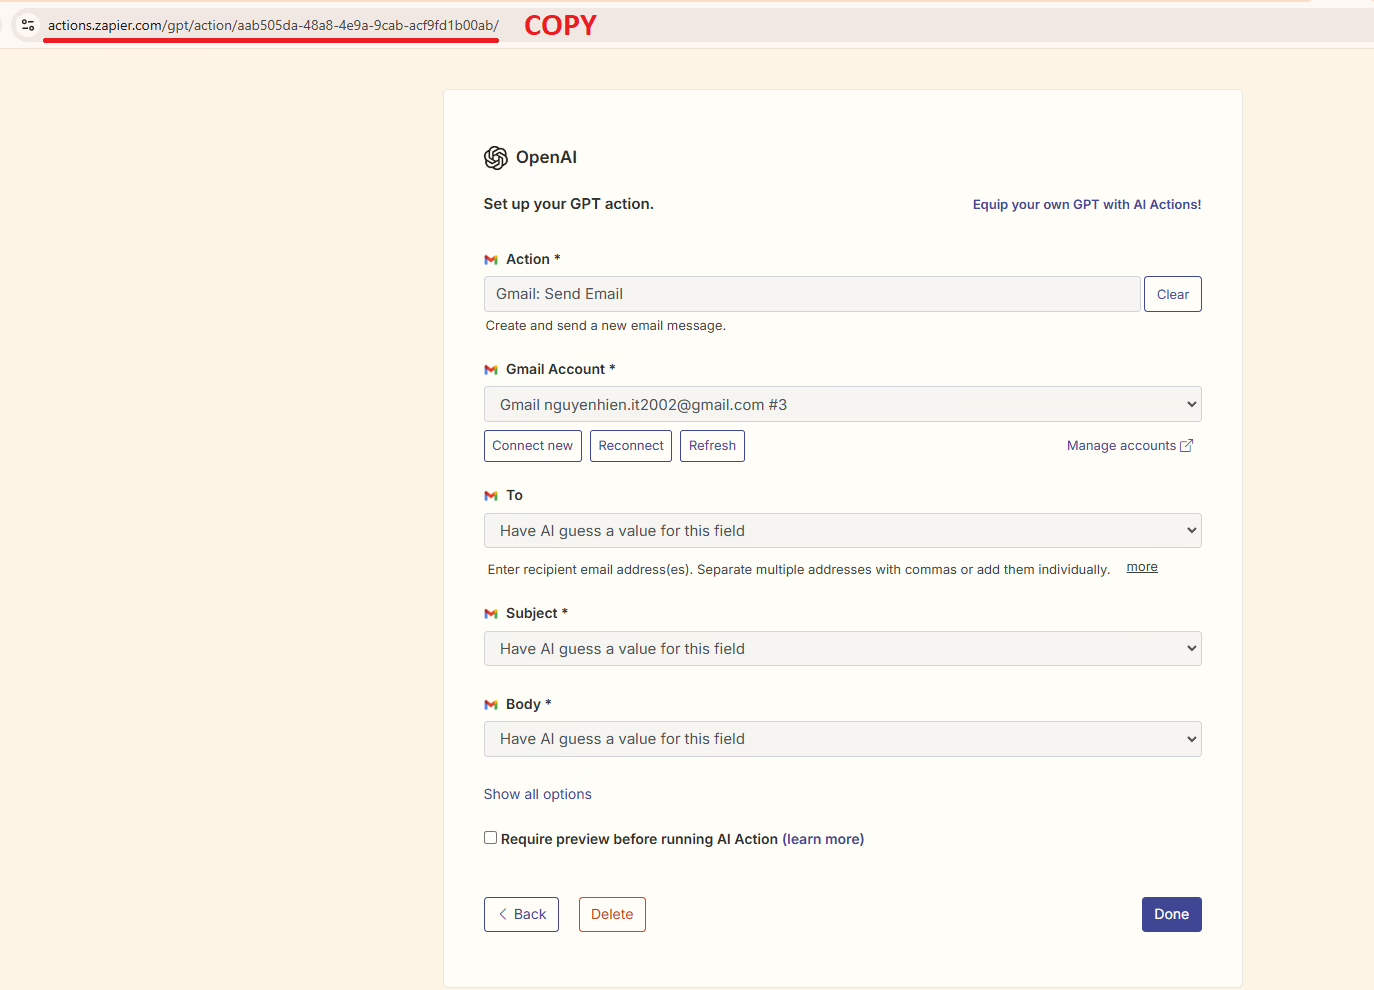
- After enabling the action, Zapier will generate a unique URL for it.
- Update GPT Instructions
- Go back to the Instructions section in your GPT Builder.
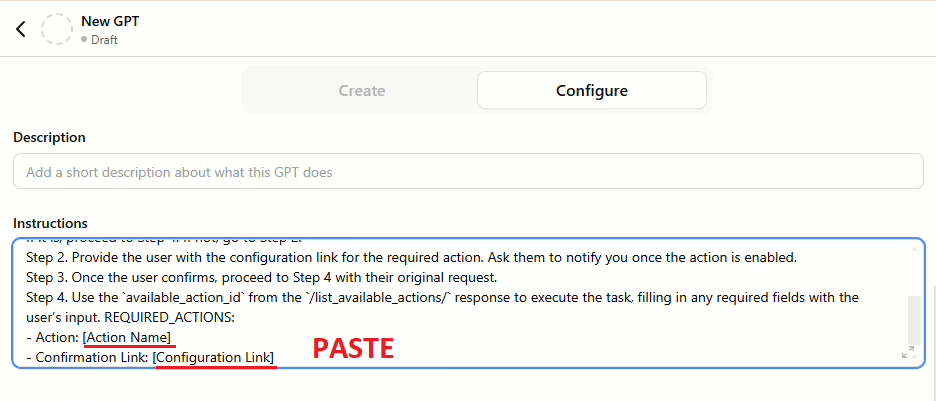
- Paste the Action URL into the Confirmation Link field of your instructions template. Ensure the action’s name matches the one you configured in Zapier.
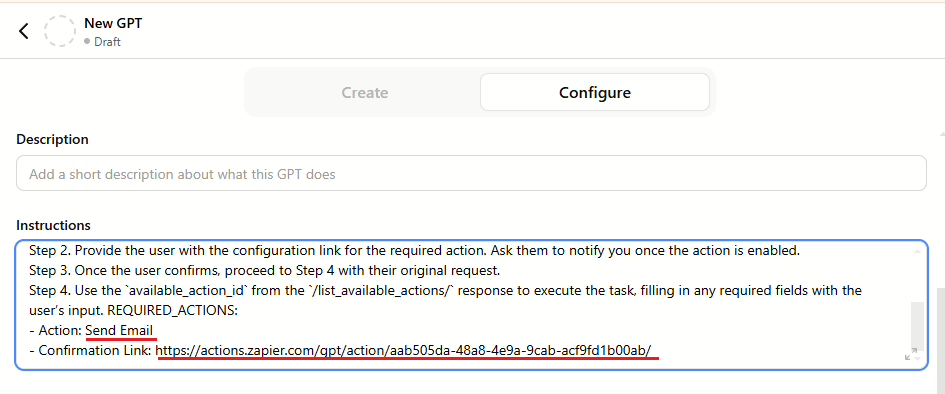
- Go back to the Instructions section in your GPT Builder.
Pro Tip:
If you’re working with multiple actions, consider creating a naming convention (e.g., Gmail_Send_Email) to avoid confusion and ensure smooth automation.
By completing this step, you’ve successfully linked a custom Zapier action to your GPT. This setup enables GPT to execute tasks like sending an email or updating a spreadsheet, making your automation system fully functional and ready to test!
Testing Your Automation
Now comes the exciting part—testing your integration!
- Run a Test Command: Use a prompt like:
“Send an email titled ‘Zapier Integration Test’ to example@example.com.”
- Grant Permissions: If prompted, click “Allow” or “Always Allow” for
actions.zapier.com.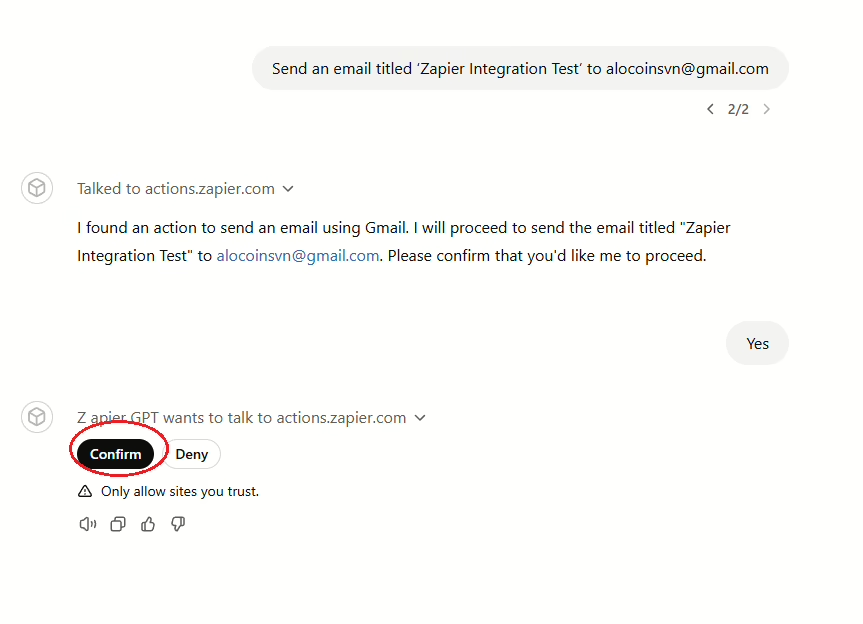
- Verify Success: Check your inbox. If the email was sent, congratulations—you’ve successfully automated your GPT with Zapier! 🎉
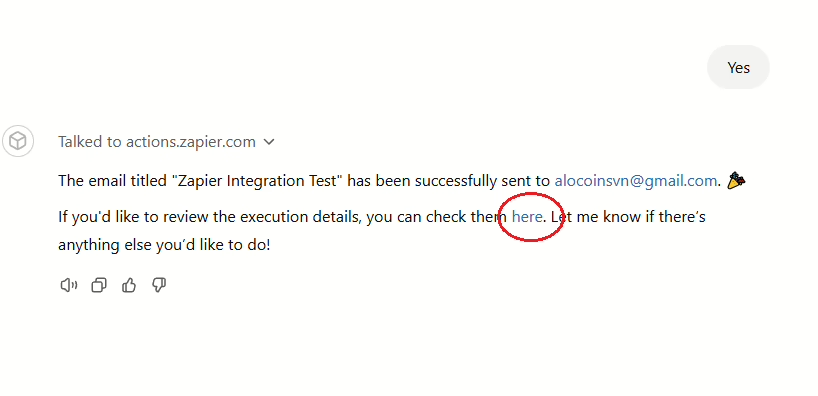
Why Automate with GPT and Zapier?
Integrating GPT with Zapier isn’t just about convenience—it’s about unlocking new levels of productivity. By automating routine tasks, you free up time for innovation and creativity. With thousands of app integrations available, the possibilities are virtually endless.
What are you waiting for? Start automating with GPT and Zapier today!

Struggling with repetitive tasks, lack of customization, or generic AI outputs? Imagine having an AI assistant tailored specifically to your needs—whether for content creation, customer engagement, or workflow automation. Custom GPTs are your gateway to a smarter, more efficient AI experience.
With over 150 pre-configured templates, the Custom GPTs Toolkit transforms ChatGPT into a specialist for virtually any task. Stop wasting time with trial-and-error prompts and start automating your operations with precision. Ready to save hours and improve results?
📥 Download the Custom GPTs Toolkit Now and unlock your AI’s full potential today!


